Case Study - Ruby Hunters
General ·My second tutorial entry is a case study on how I used Card Creatr Studio to draft cards for a prototype of mine, called Ruby Hunters. You will learn about asset management, card-specific template customization, dropdown fields, and custom card dimensions.
Preview of Final Product
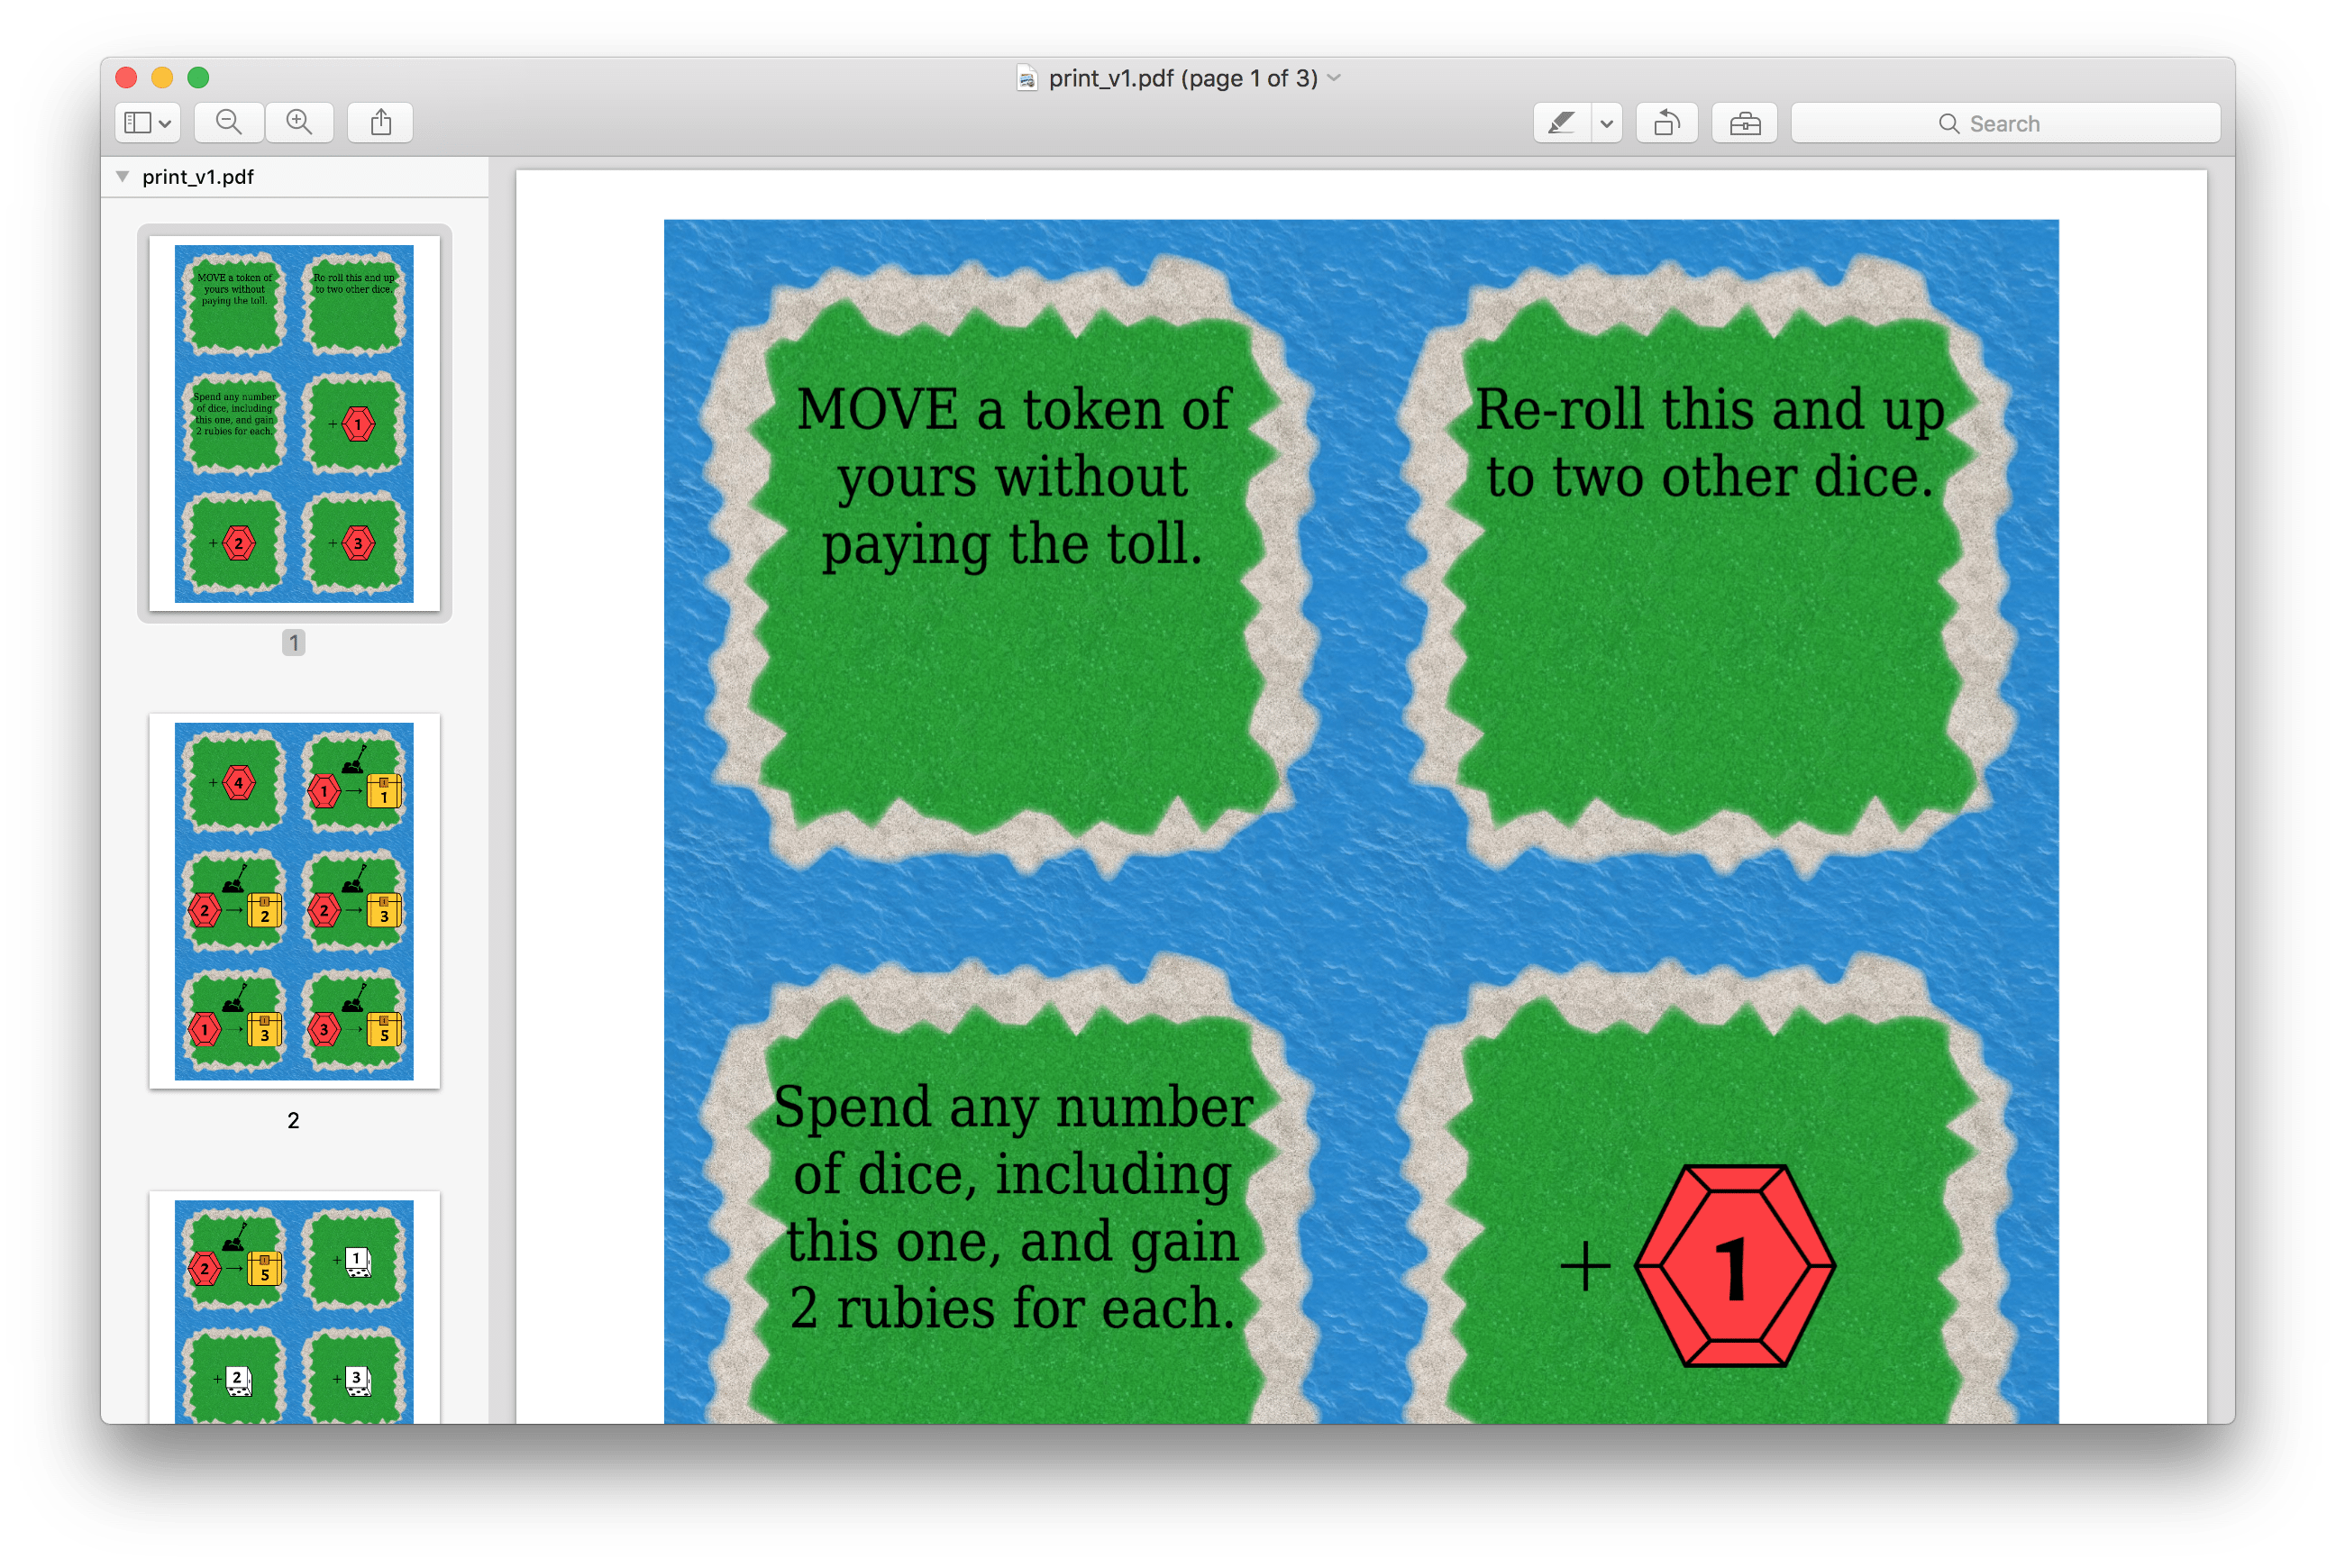
We will be creating a deck of 3.5-inch square cards for printing. There are several possible card layouts. Here is the PDF output that we will be creating by the end of this tutorial, with 6 cards per page:
Step 1: Create Illustrations
Card Creatr Studio is a card database and layout/finishing tool. It is not designed to be a full-powered graphic design suite. The building blocks tutorial describes how to create basic shapes, but for more complex designs, you want a more featureful graphic design tool.
I used Adobe Illustrator to create some initial designs:
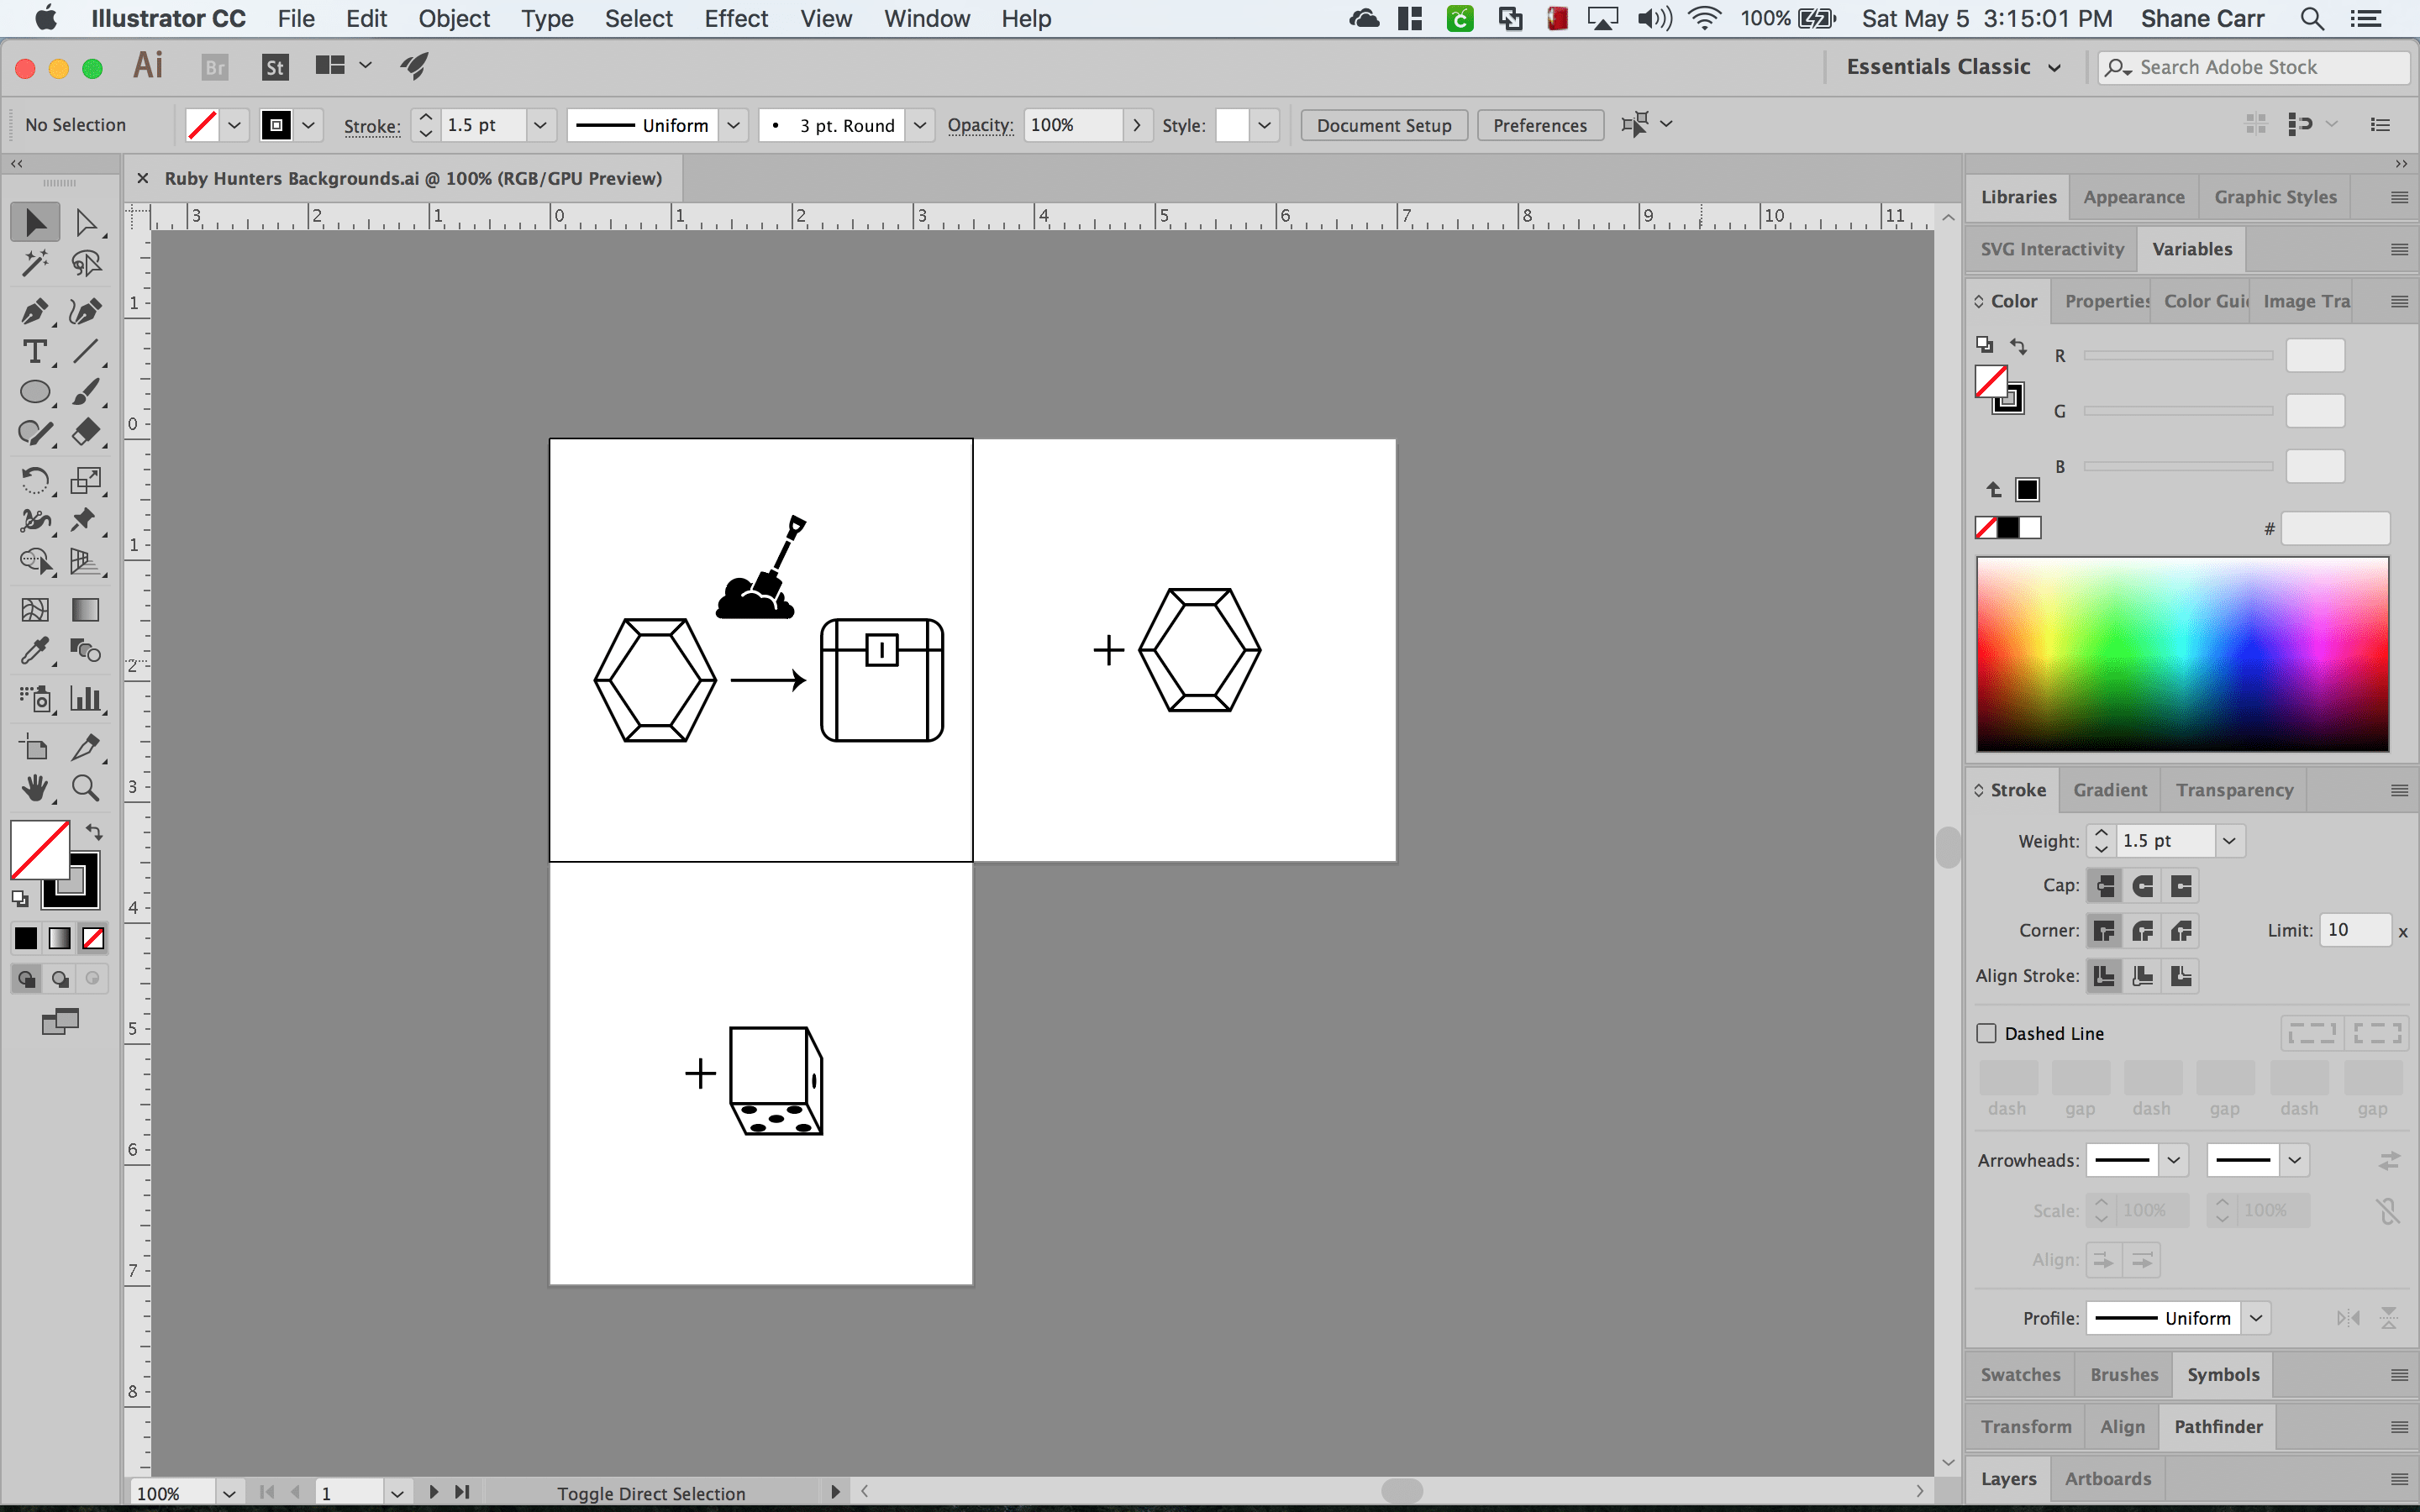
Another great piece of software is Inkscape, which is free, unlike Adobe Illustrator. Photoshop and GIMP can also be used, but I prefer Illustrator and Inkscape because they produce vector graphics.
Step 2: Import Illustrations
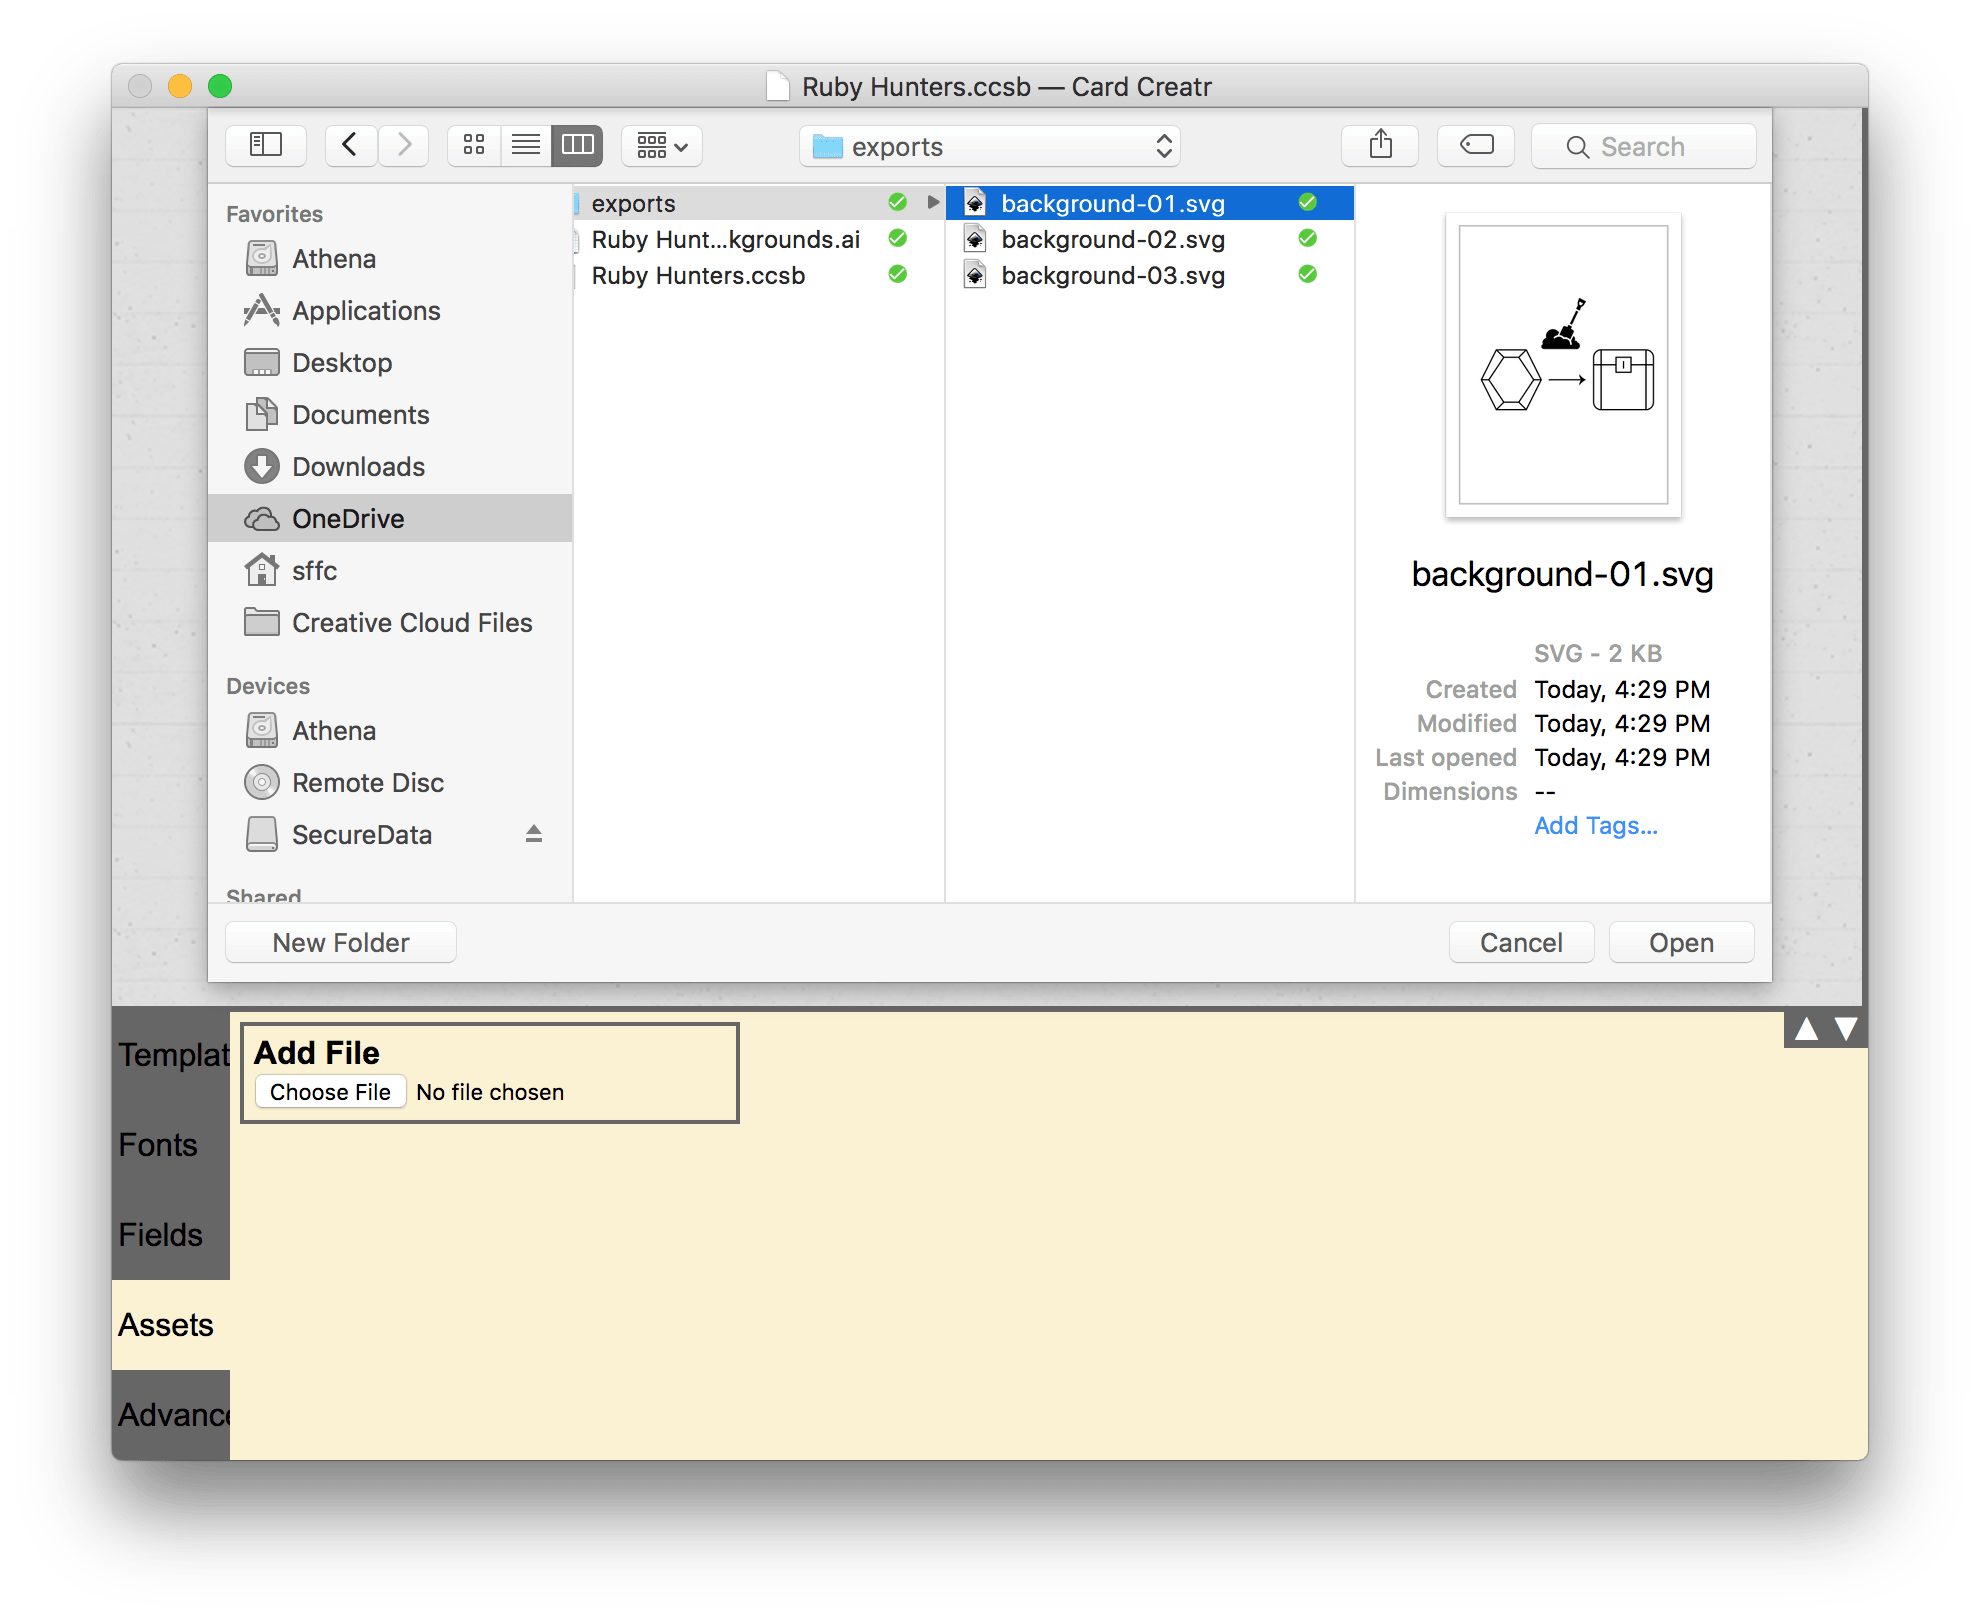
Next, you want to import your illustrations into Card Creatr Studio. Export your illustrations as SVG (in Illustrator/Inkscape) or PNG (in Photoshop/GIMP). In Card Creatr Studio, create a new document. Under “properties”, open the Assets tab, and click “Choose File” to add a new asset:
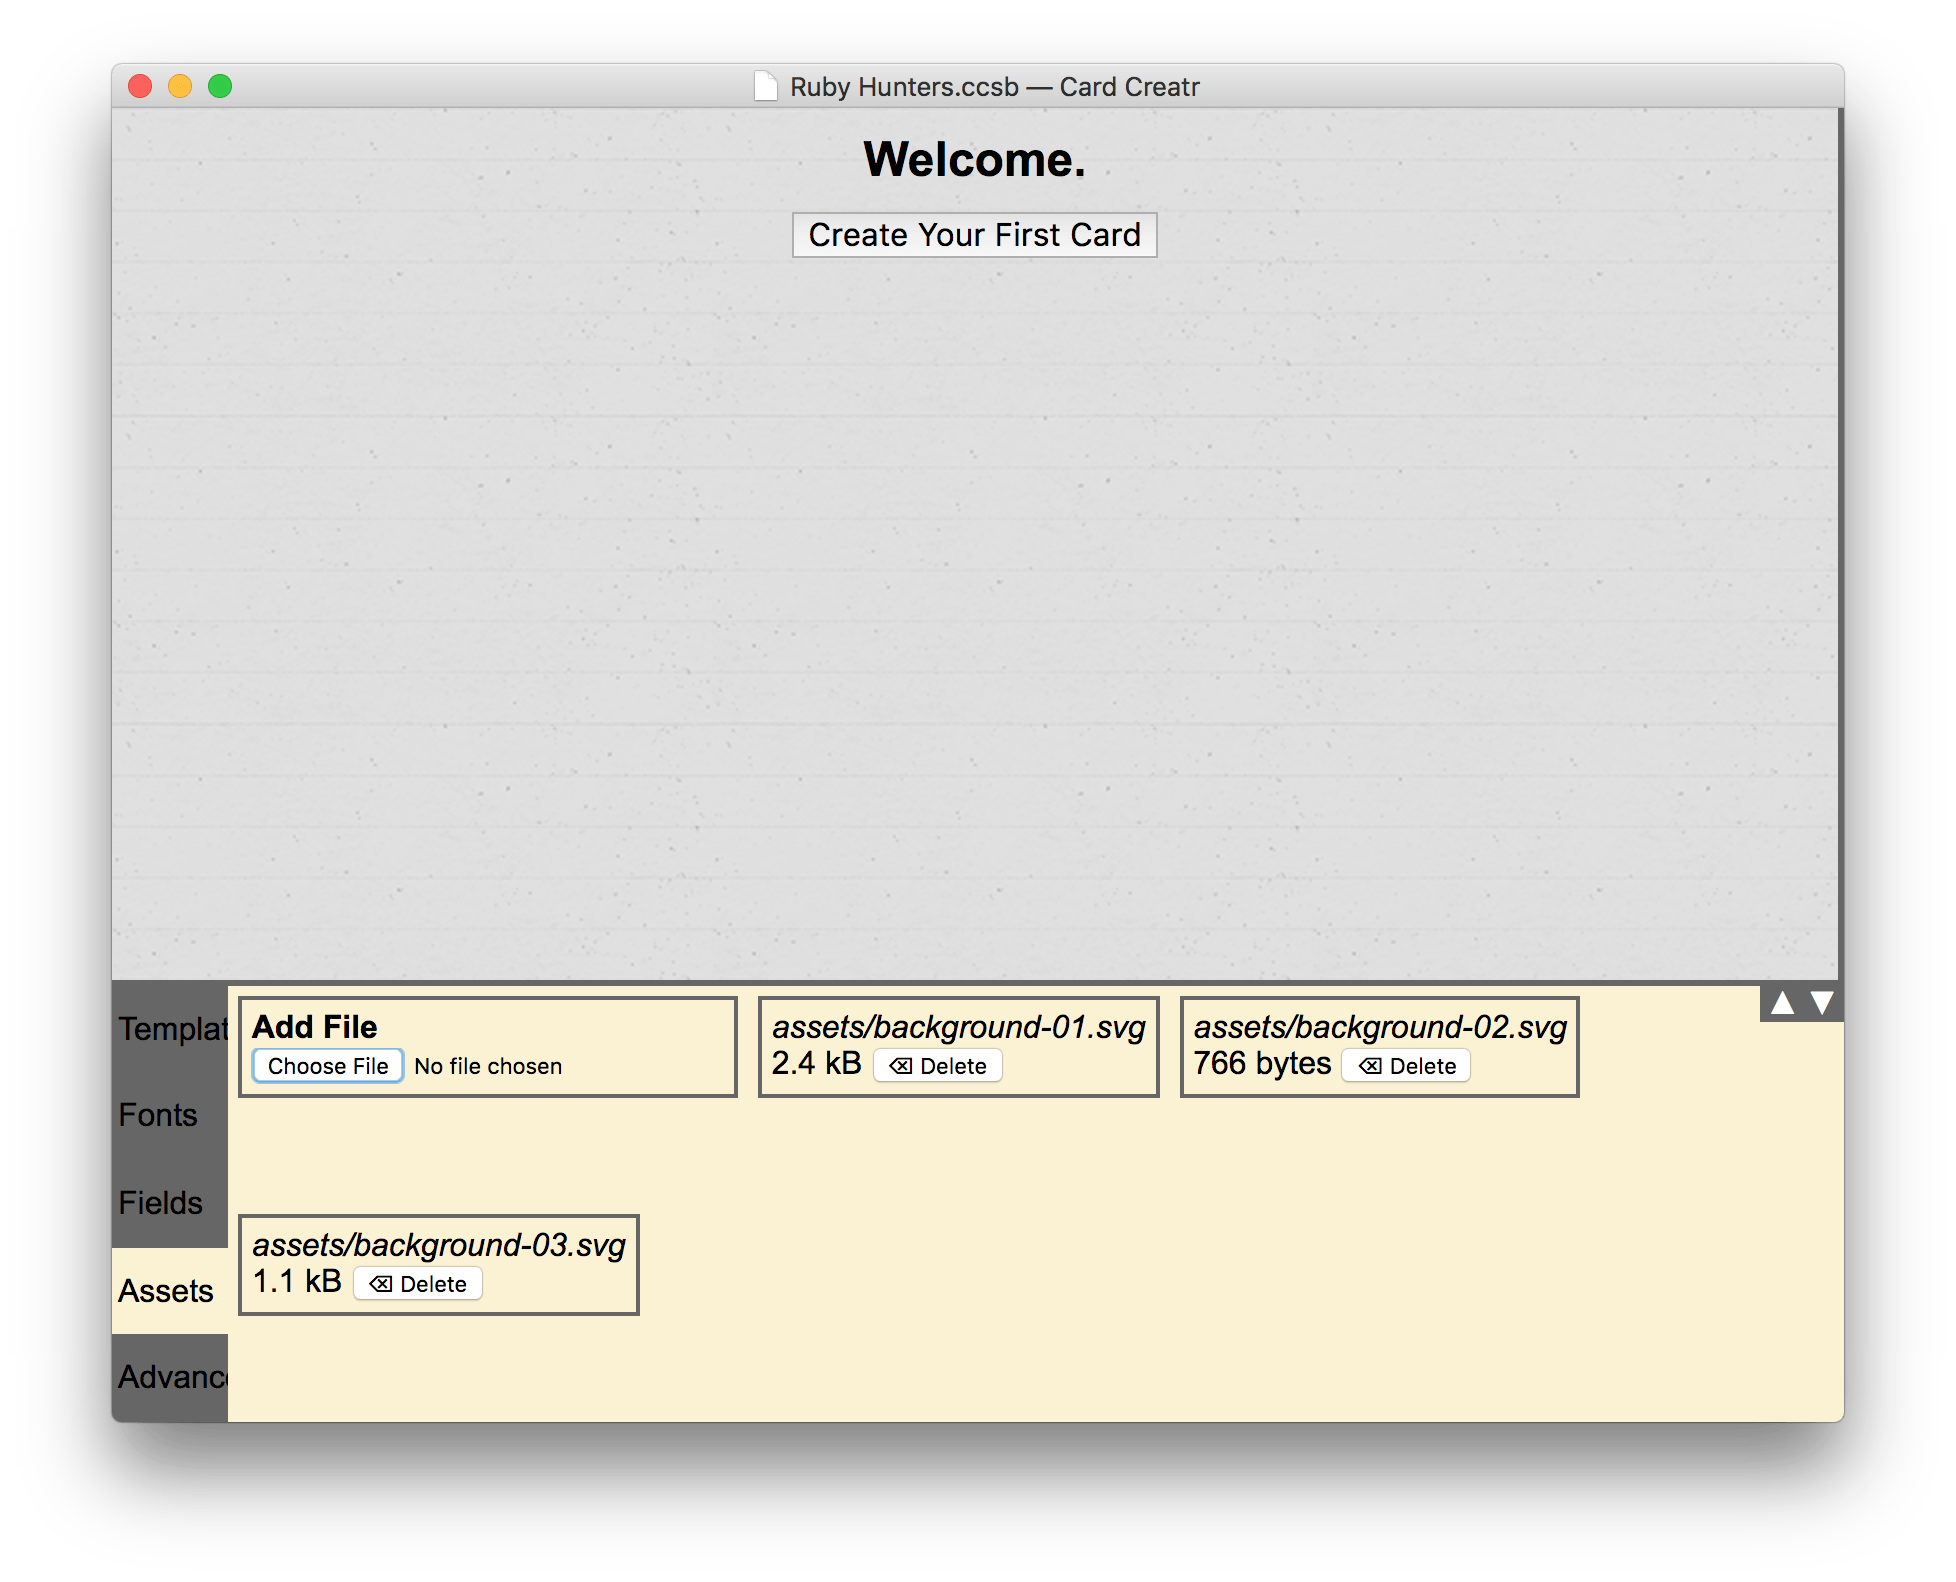
Once you add all your assets, you should see them here:
In order to make the assets accessible to templates, there is unfortunately one more step. It’s not too hard, and it needs to be done only once. Open the Advanced tab, and under the “assets” block, enter a line like this for each asset:
"image_identifier (img,path)": "assets/filename.svg"
Customize image_identifier, which is how you will refer to this image in templates, and filename.svg (or png), which should correspond to the name under the Assets tab. Example:
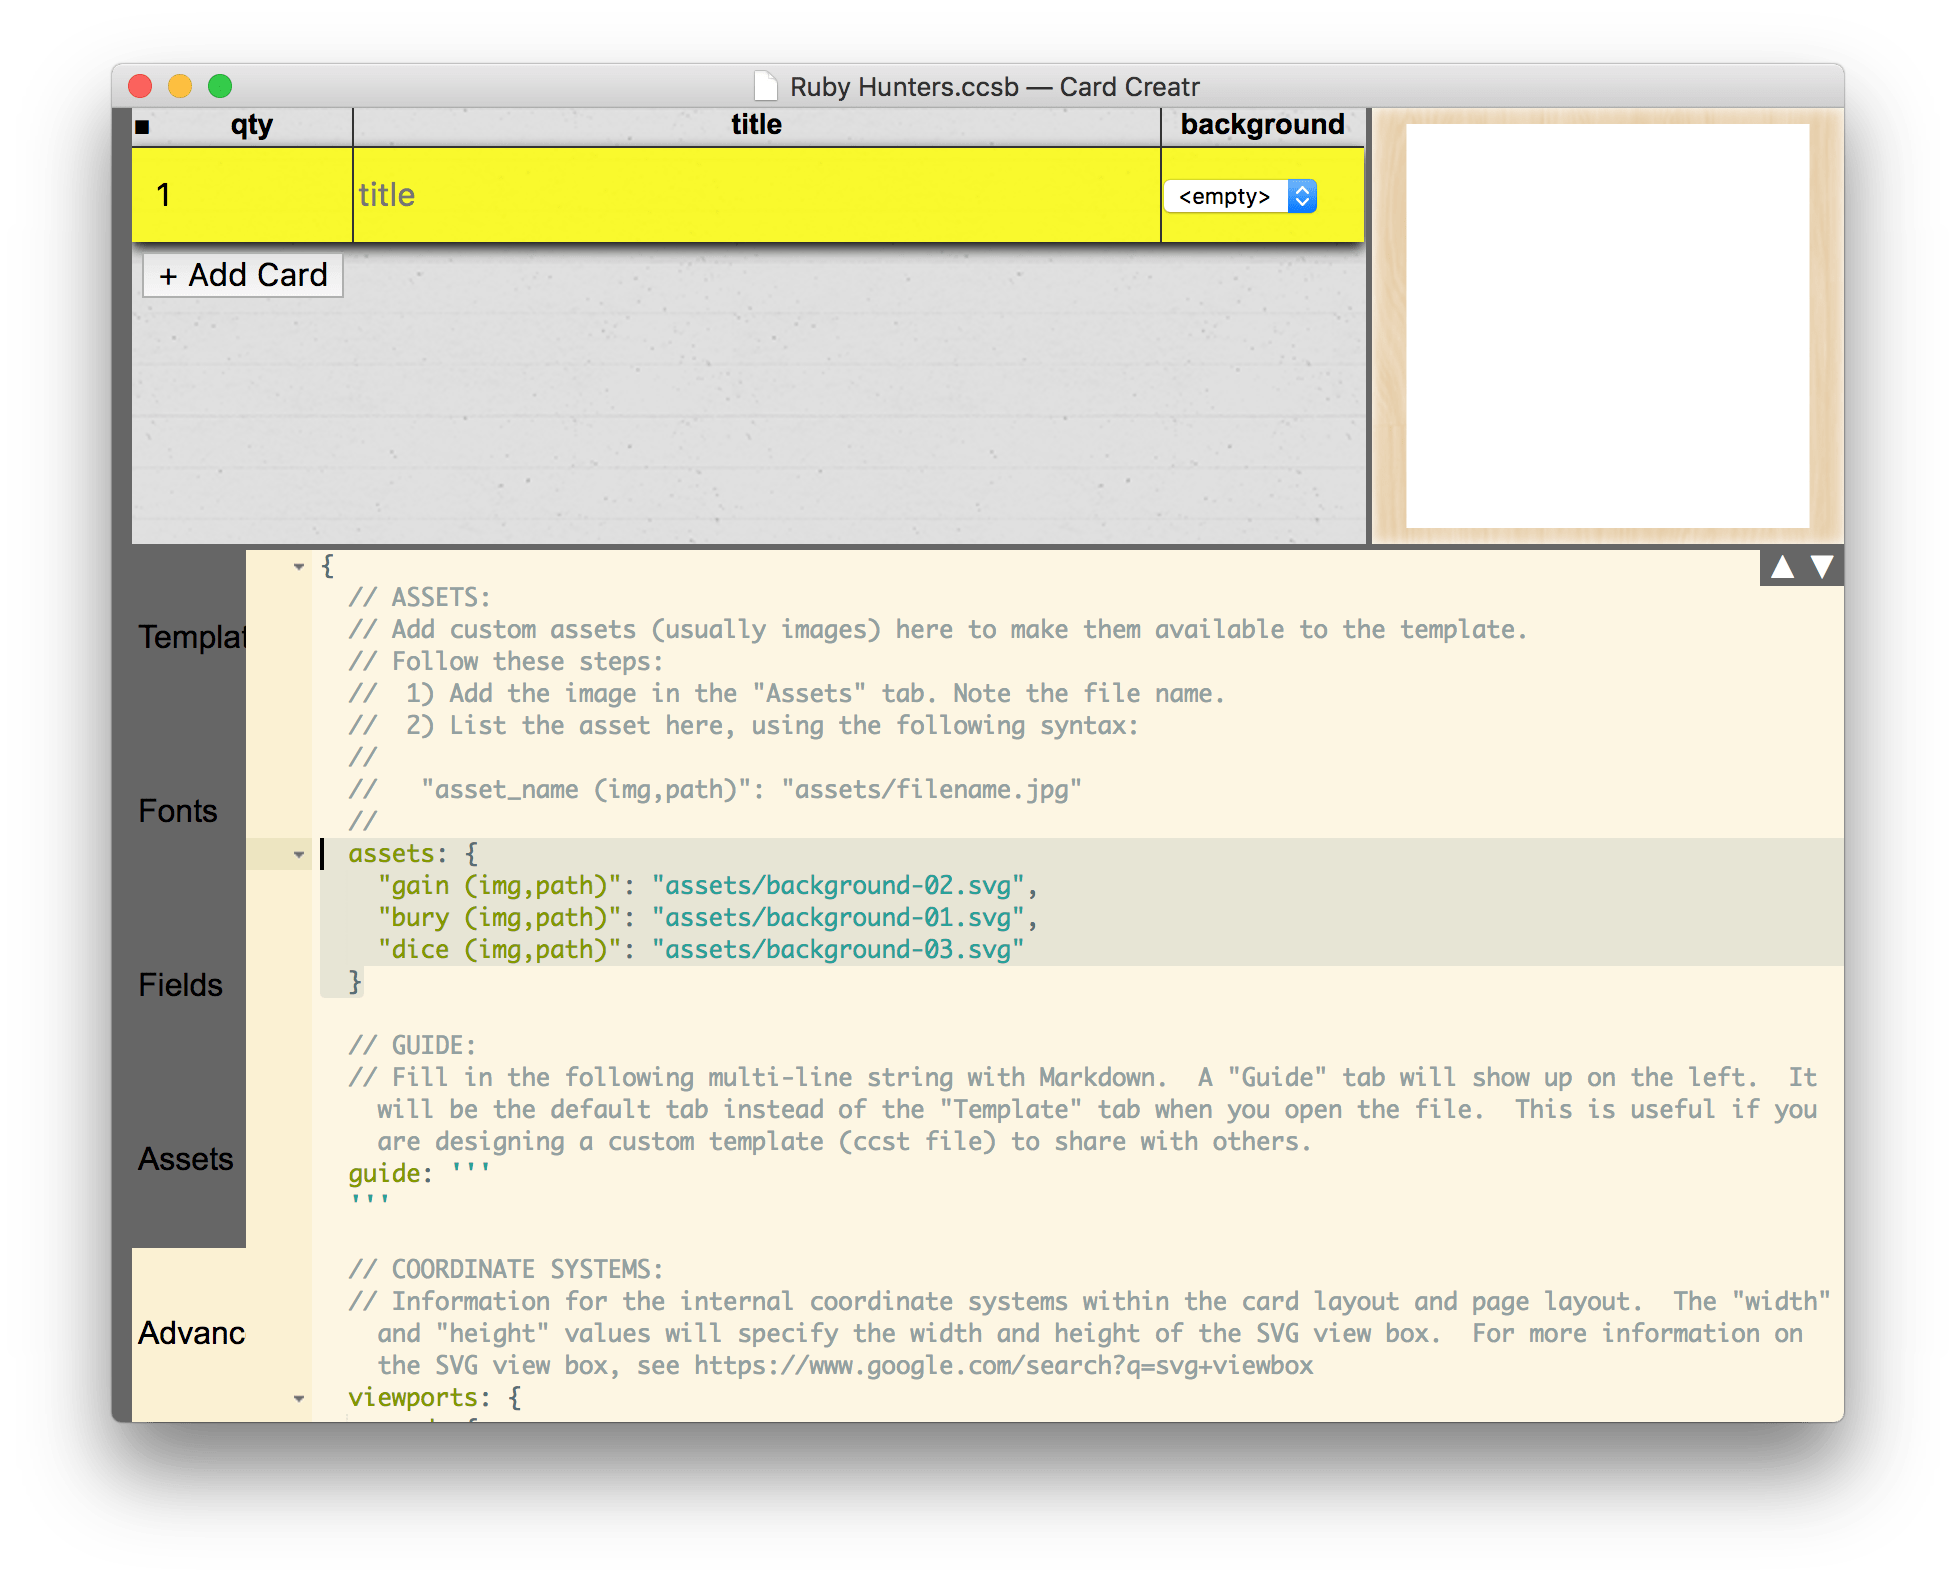
This additional step might be eliminated in a future version of Card Creatr Studio.
Step 3: Add Dropdown Menu
We have three different background images, and we want to be able to choose which one to use. To do this, we can use a dropdown menu field.
Open the Fields tab, and add a new field with display “dropdown.” In the “Dropdown Options” text box, enter the options to appear in the dropdown menu. This dropdown menu will appear for every row in the spreadsheet.
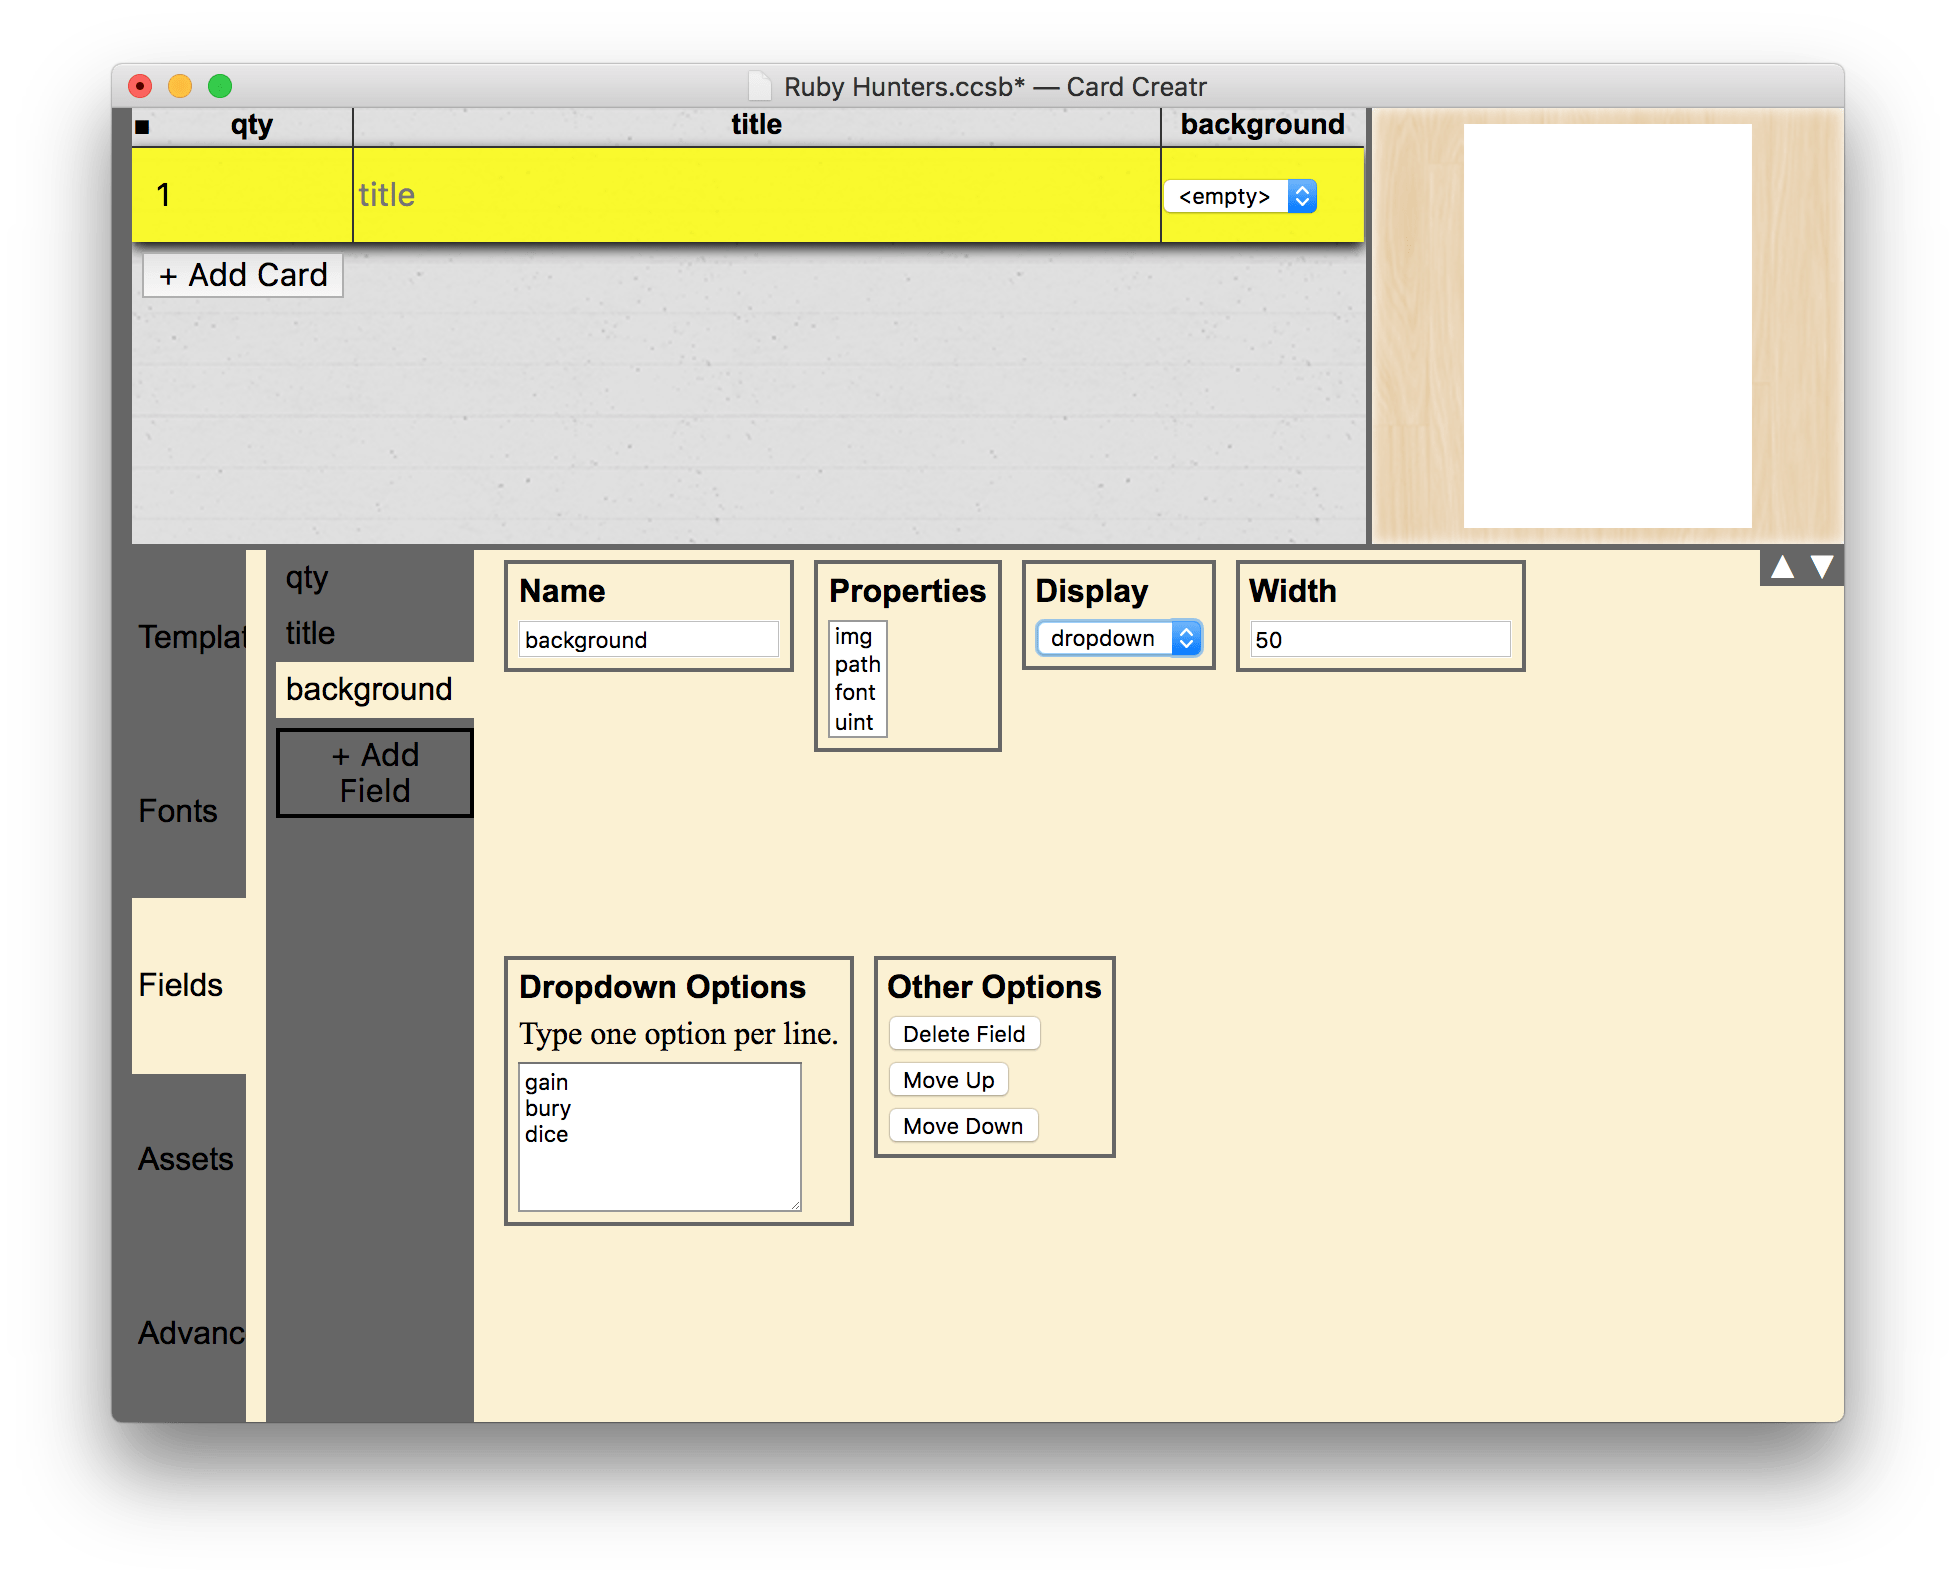
I made my dropdown menu options the same as the names of the assets in the Advanced tab.
Step 4: Customize Card Dimensions
By default, cards are poker-sized (2.5 by 3.5 inches). However, we want 3.5-inch square cards. To do this, change some settings in the “viewports” and “dimensions” sections of the Advanced tab.
You’ll need to change a few different places. Under “dimensions”, you start with this:
	card: {
		// 2.5 in by 3.5 in
		unit: "pt"
		width: 180
		height: 252
		dpi: 300
This setting controls the preview pane and the “Export Card Images” export option. Change it to:
	card: {
		// 3.5 in by 3.5 in
		unit: "pt"
		width: 252
		height: 252
		dpi: 300
Under “viewports”, you have this:
	page: {
		width: 612
		height: 792
		cardWidth: 180
		cardHeight: 252
This setting controls how big the cards are in the “Export as PDF” export option. Change it to:
	page: {
		width: 612
		height: 792
		cardWidth: 252
		cardHeight: 252
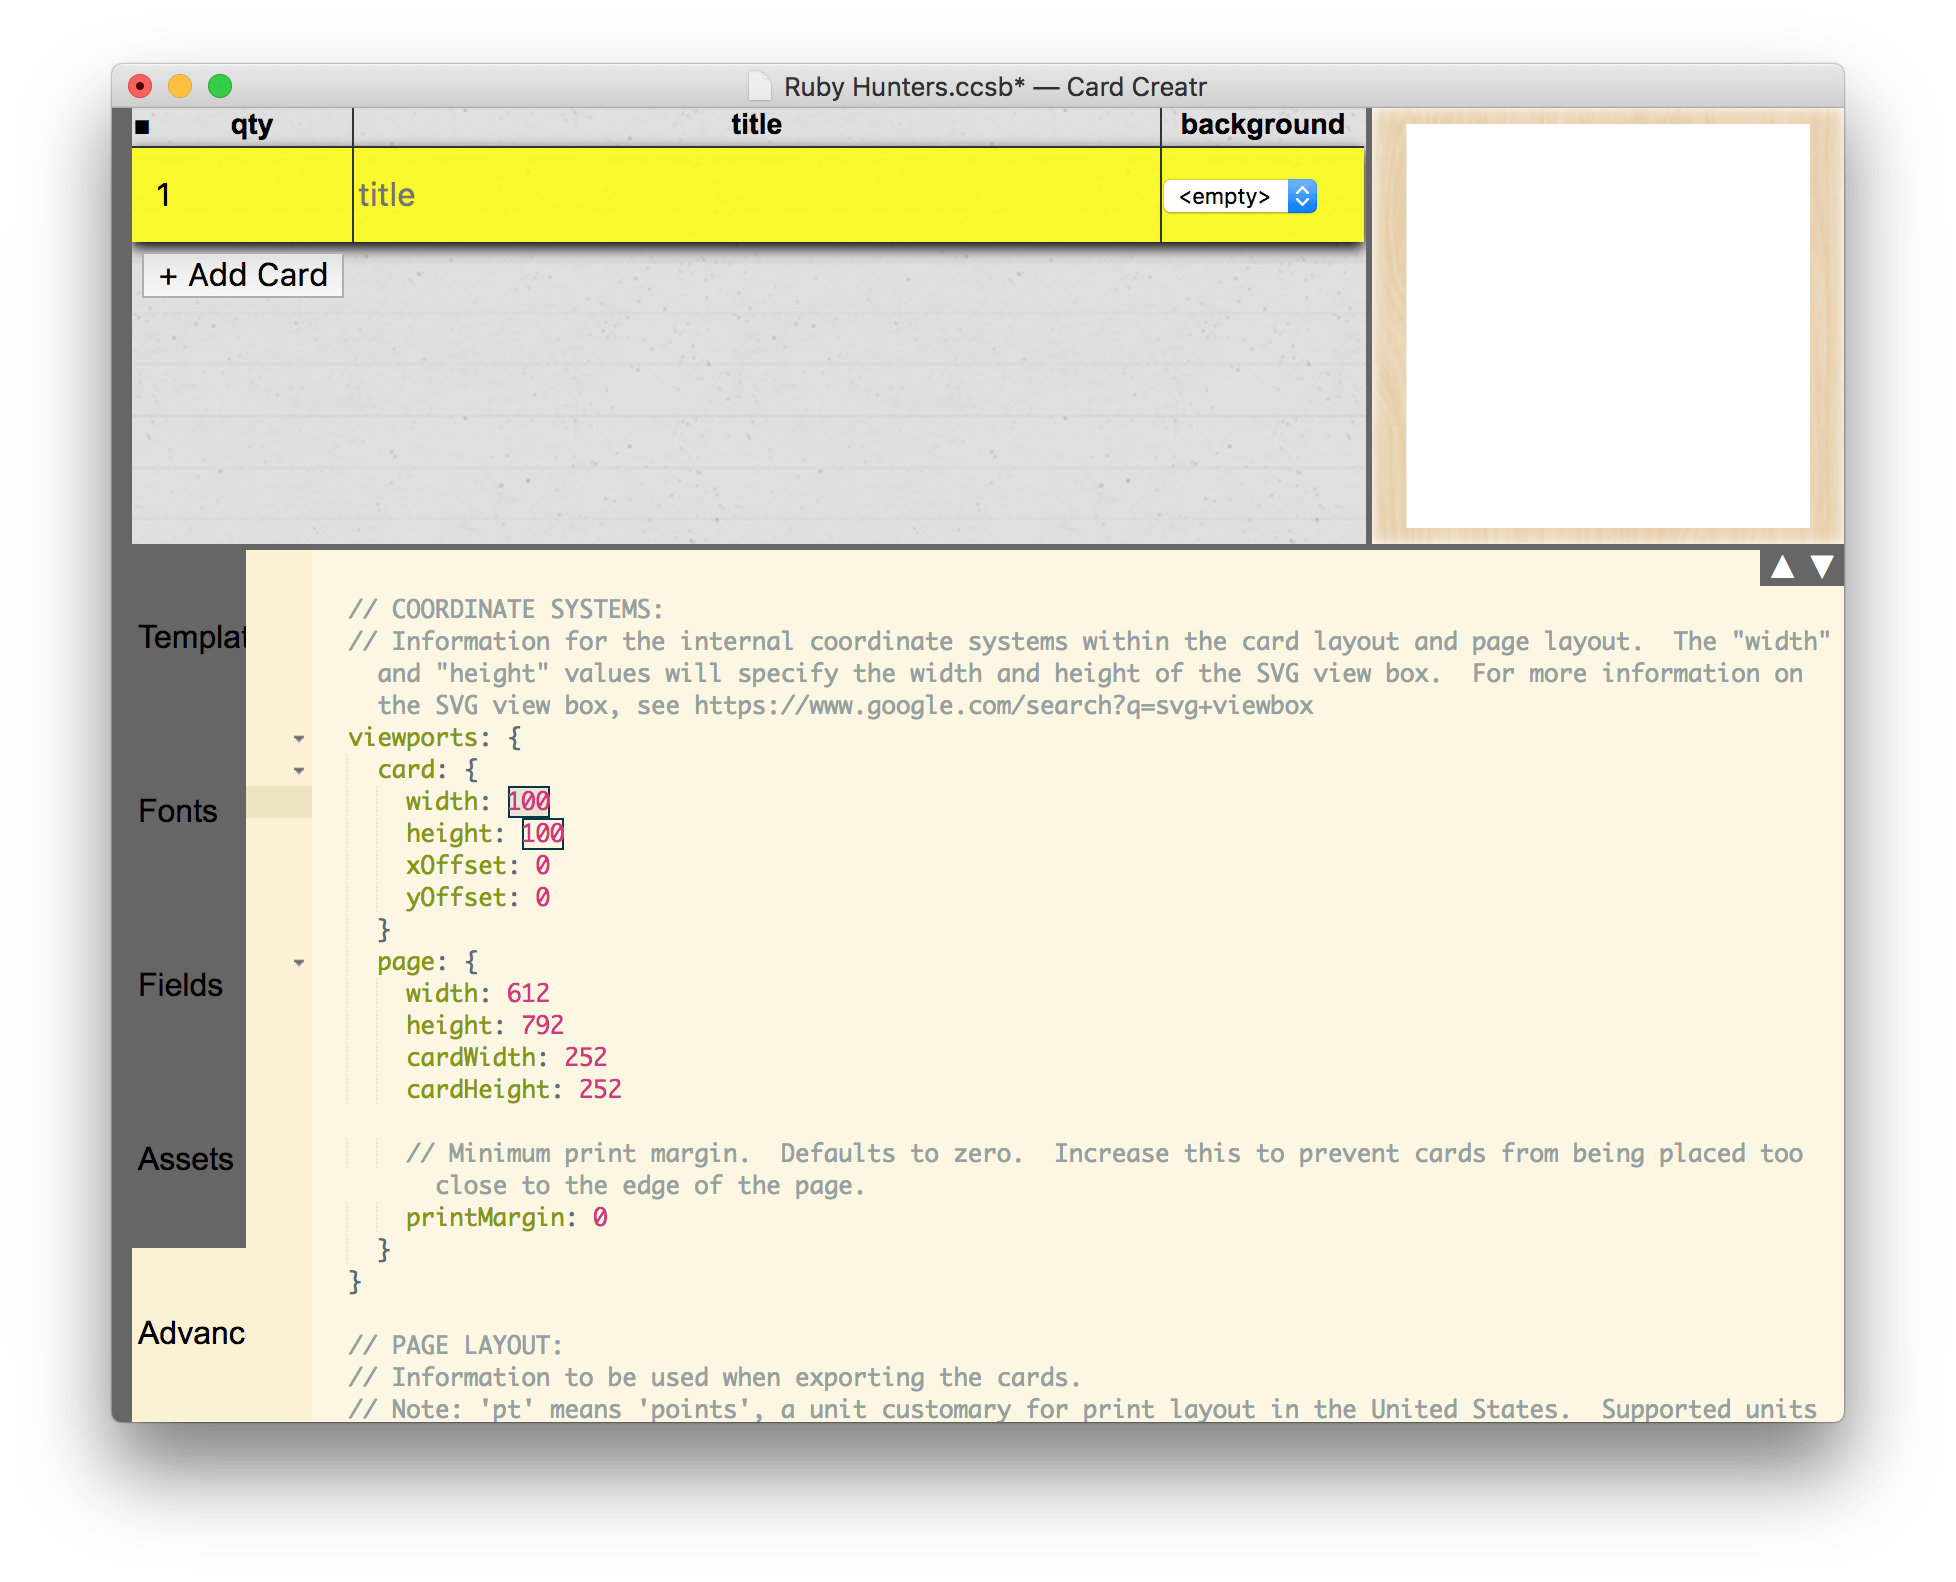
Finally, also under “viewports”, you have:
	card: {
		width: 180
		height: 252
This setting controls the coordinate system used within the card template. You can technically put any values you want here, and the card will scale accordingly. You could put 252 for both width and height, which would correspond to points, but to demonstrate what this setting actually does, we will set both width and height to 100:
	card: {
		width: 100
		height: 100
Step 5: Create Template
We are finished with the Advanced tab. Now, switch back to the Template tab so that we can start our card layout.
First, we want to create a white background rectangle that covers our entire card. Our viewport is 100x100, so set width and height to 100:
rect(x=0, y=0, width=100, height=100, fill="white")
Now, we want the background image to depend on the option selected in the spreadsheet. Our column is named background. Since the options for background are the same as the image IDs in the Advanced tab, we can use this little shortcut:
assets[background]
If you don’t want a variable asset, you can access it like this:
assets.image_identifier
We want our background image to fill the whole card, on top of the white square. We can use the +imageFill built-in helper function, described in more detail in the building blocks tutorial:
+imageFill(assets[background], 0, 0, 100, 100)
We end up with this:

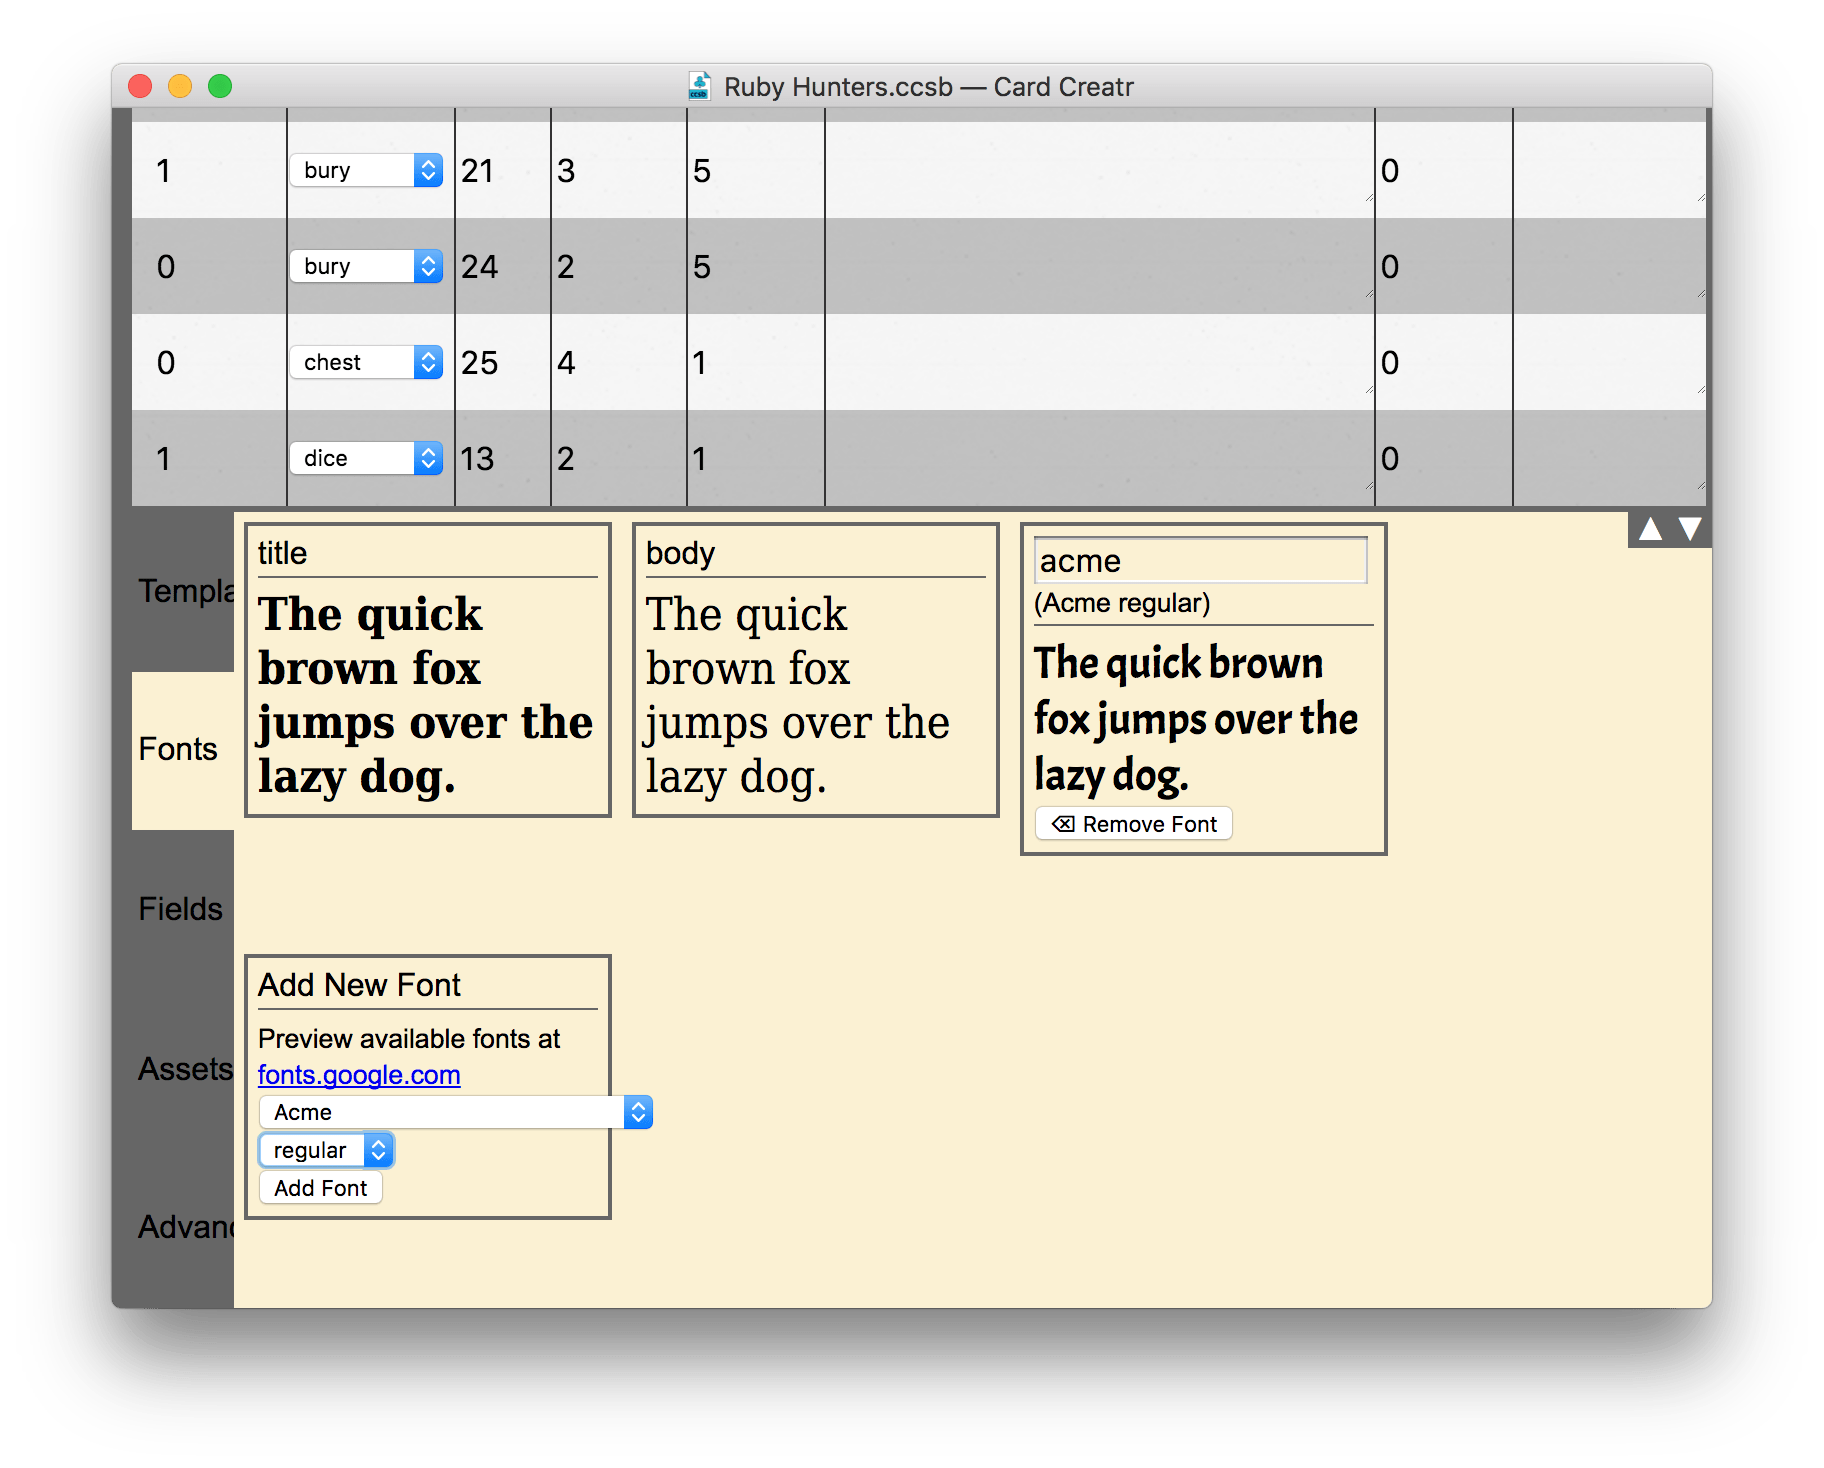
I will also add a custom font that we will use for our template. I went to fonts.google.com and chose a font named “acme.” To add it to my project, I go to the Fonts tab and use the “Add Font” selector to add it:
Step 6: Custom Layouts for Each Background
Since we have the full power of JavaScript at our disposal, we can create “if” statements that change the tutorial based on the option selected in the dropdown menu.
This is more easilly illustrated with template code:
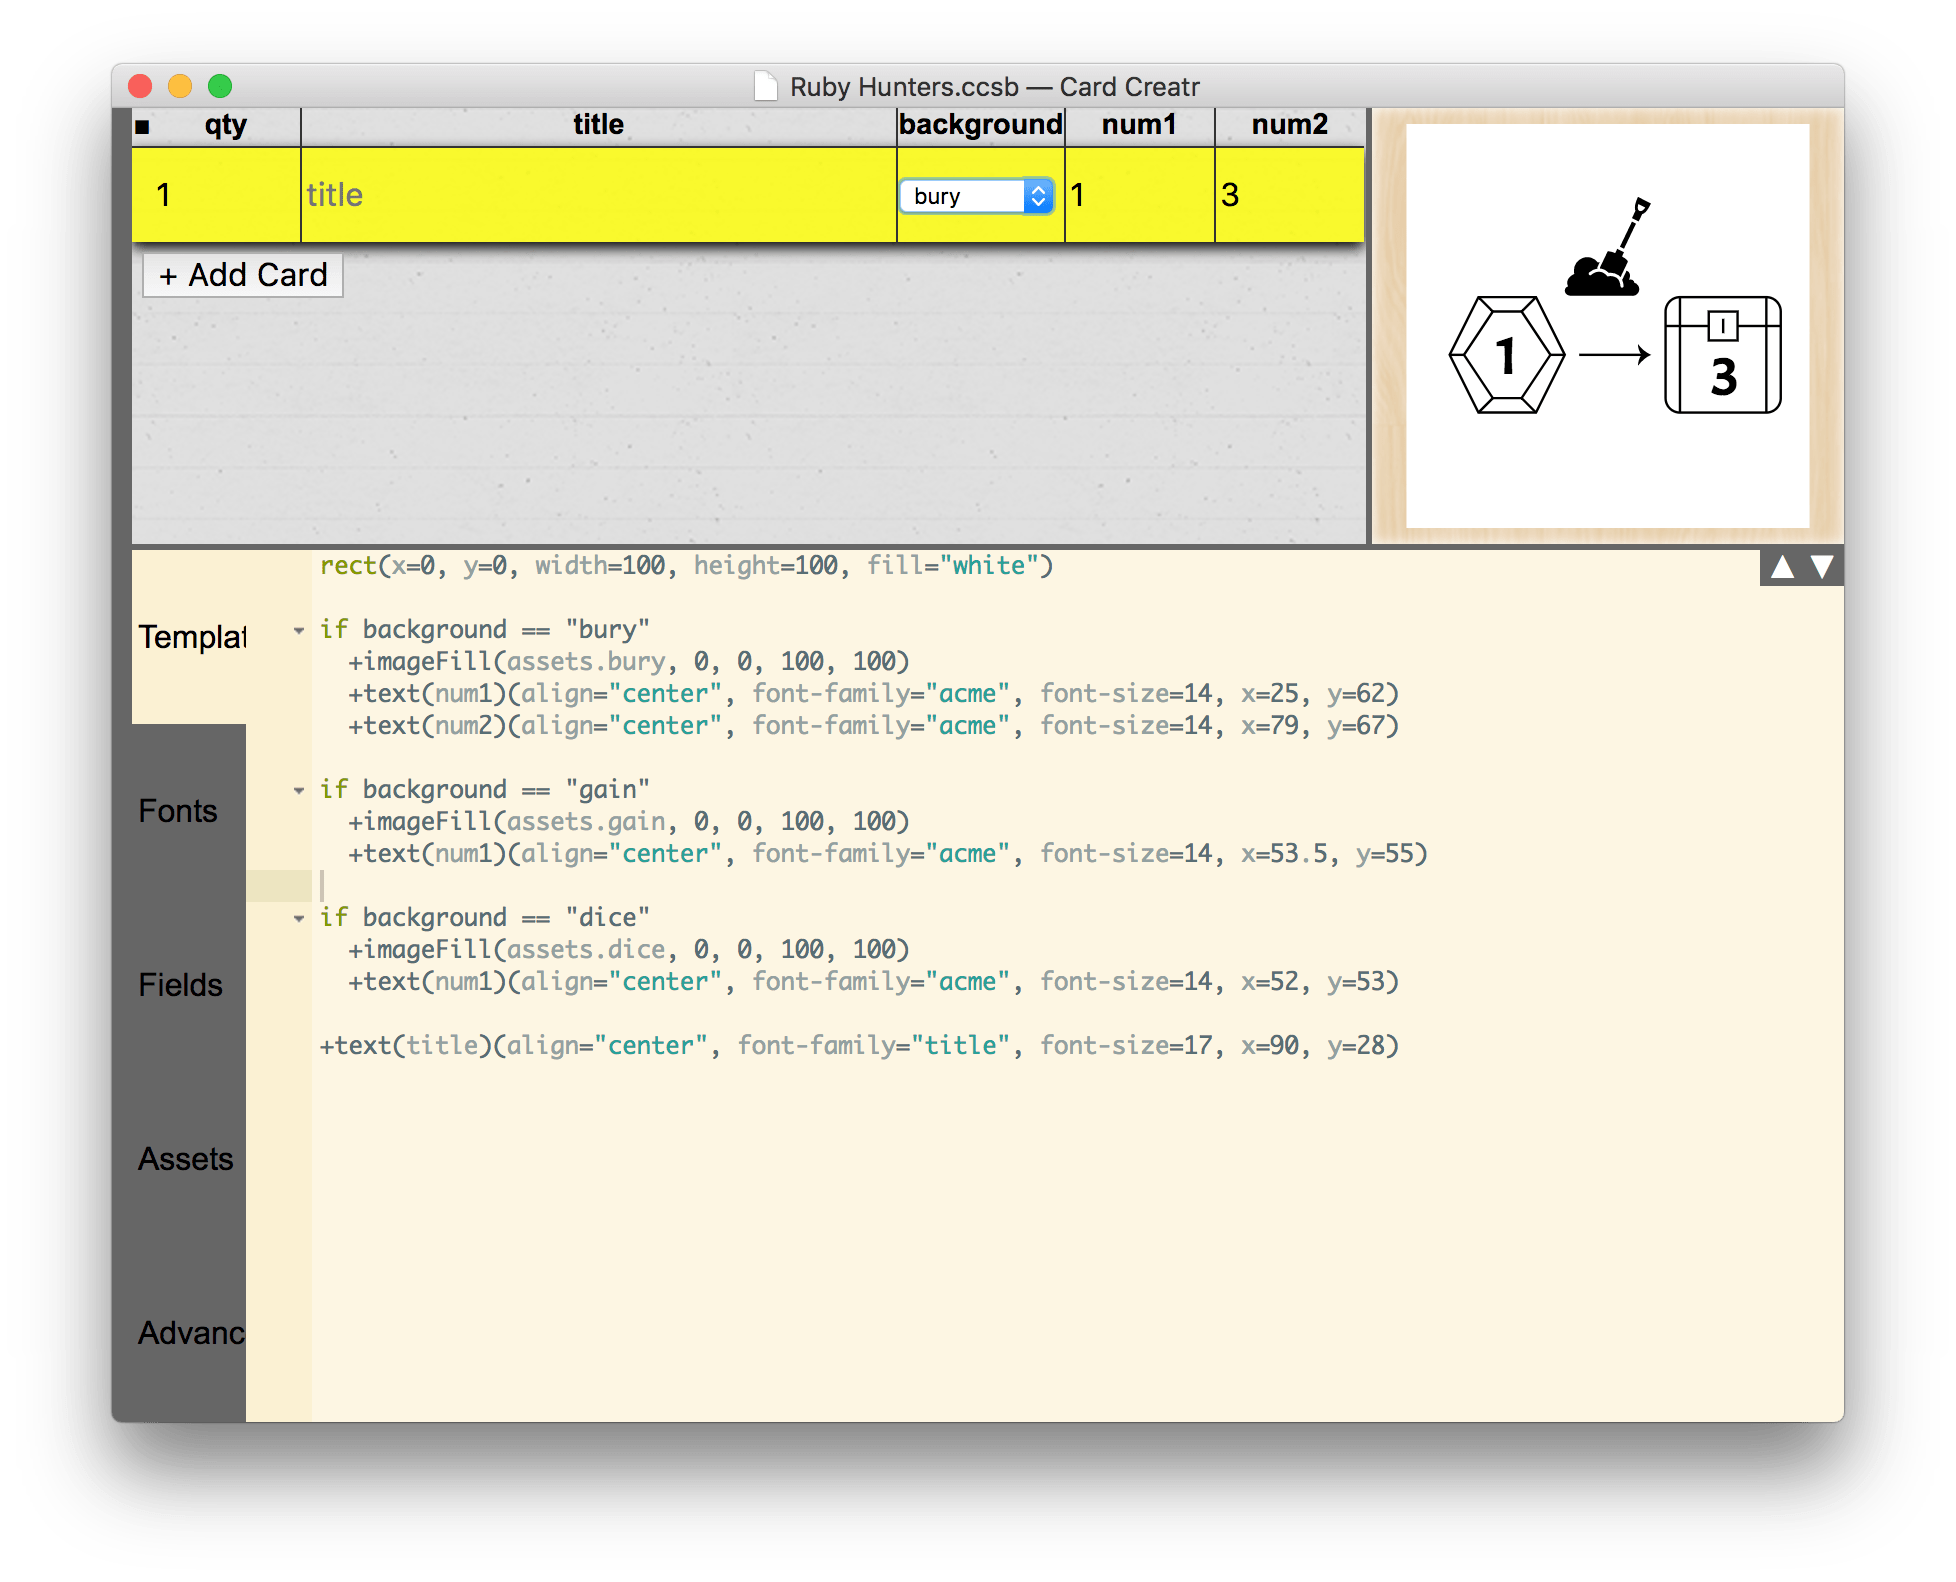
I created three “if” statements; only one of them will run for a particular card based on the value chosen in the “background” dropdown menu.
I also added two fields for numbers. The positions of the numbers also depend on which background was chosen, and two of the templates use only one of the two number fields. I set the font of the numbers to “acme,” the one I added to the project in Step 5.
Step 7: Finishing and Printing
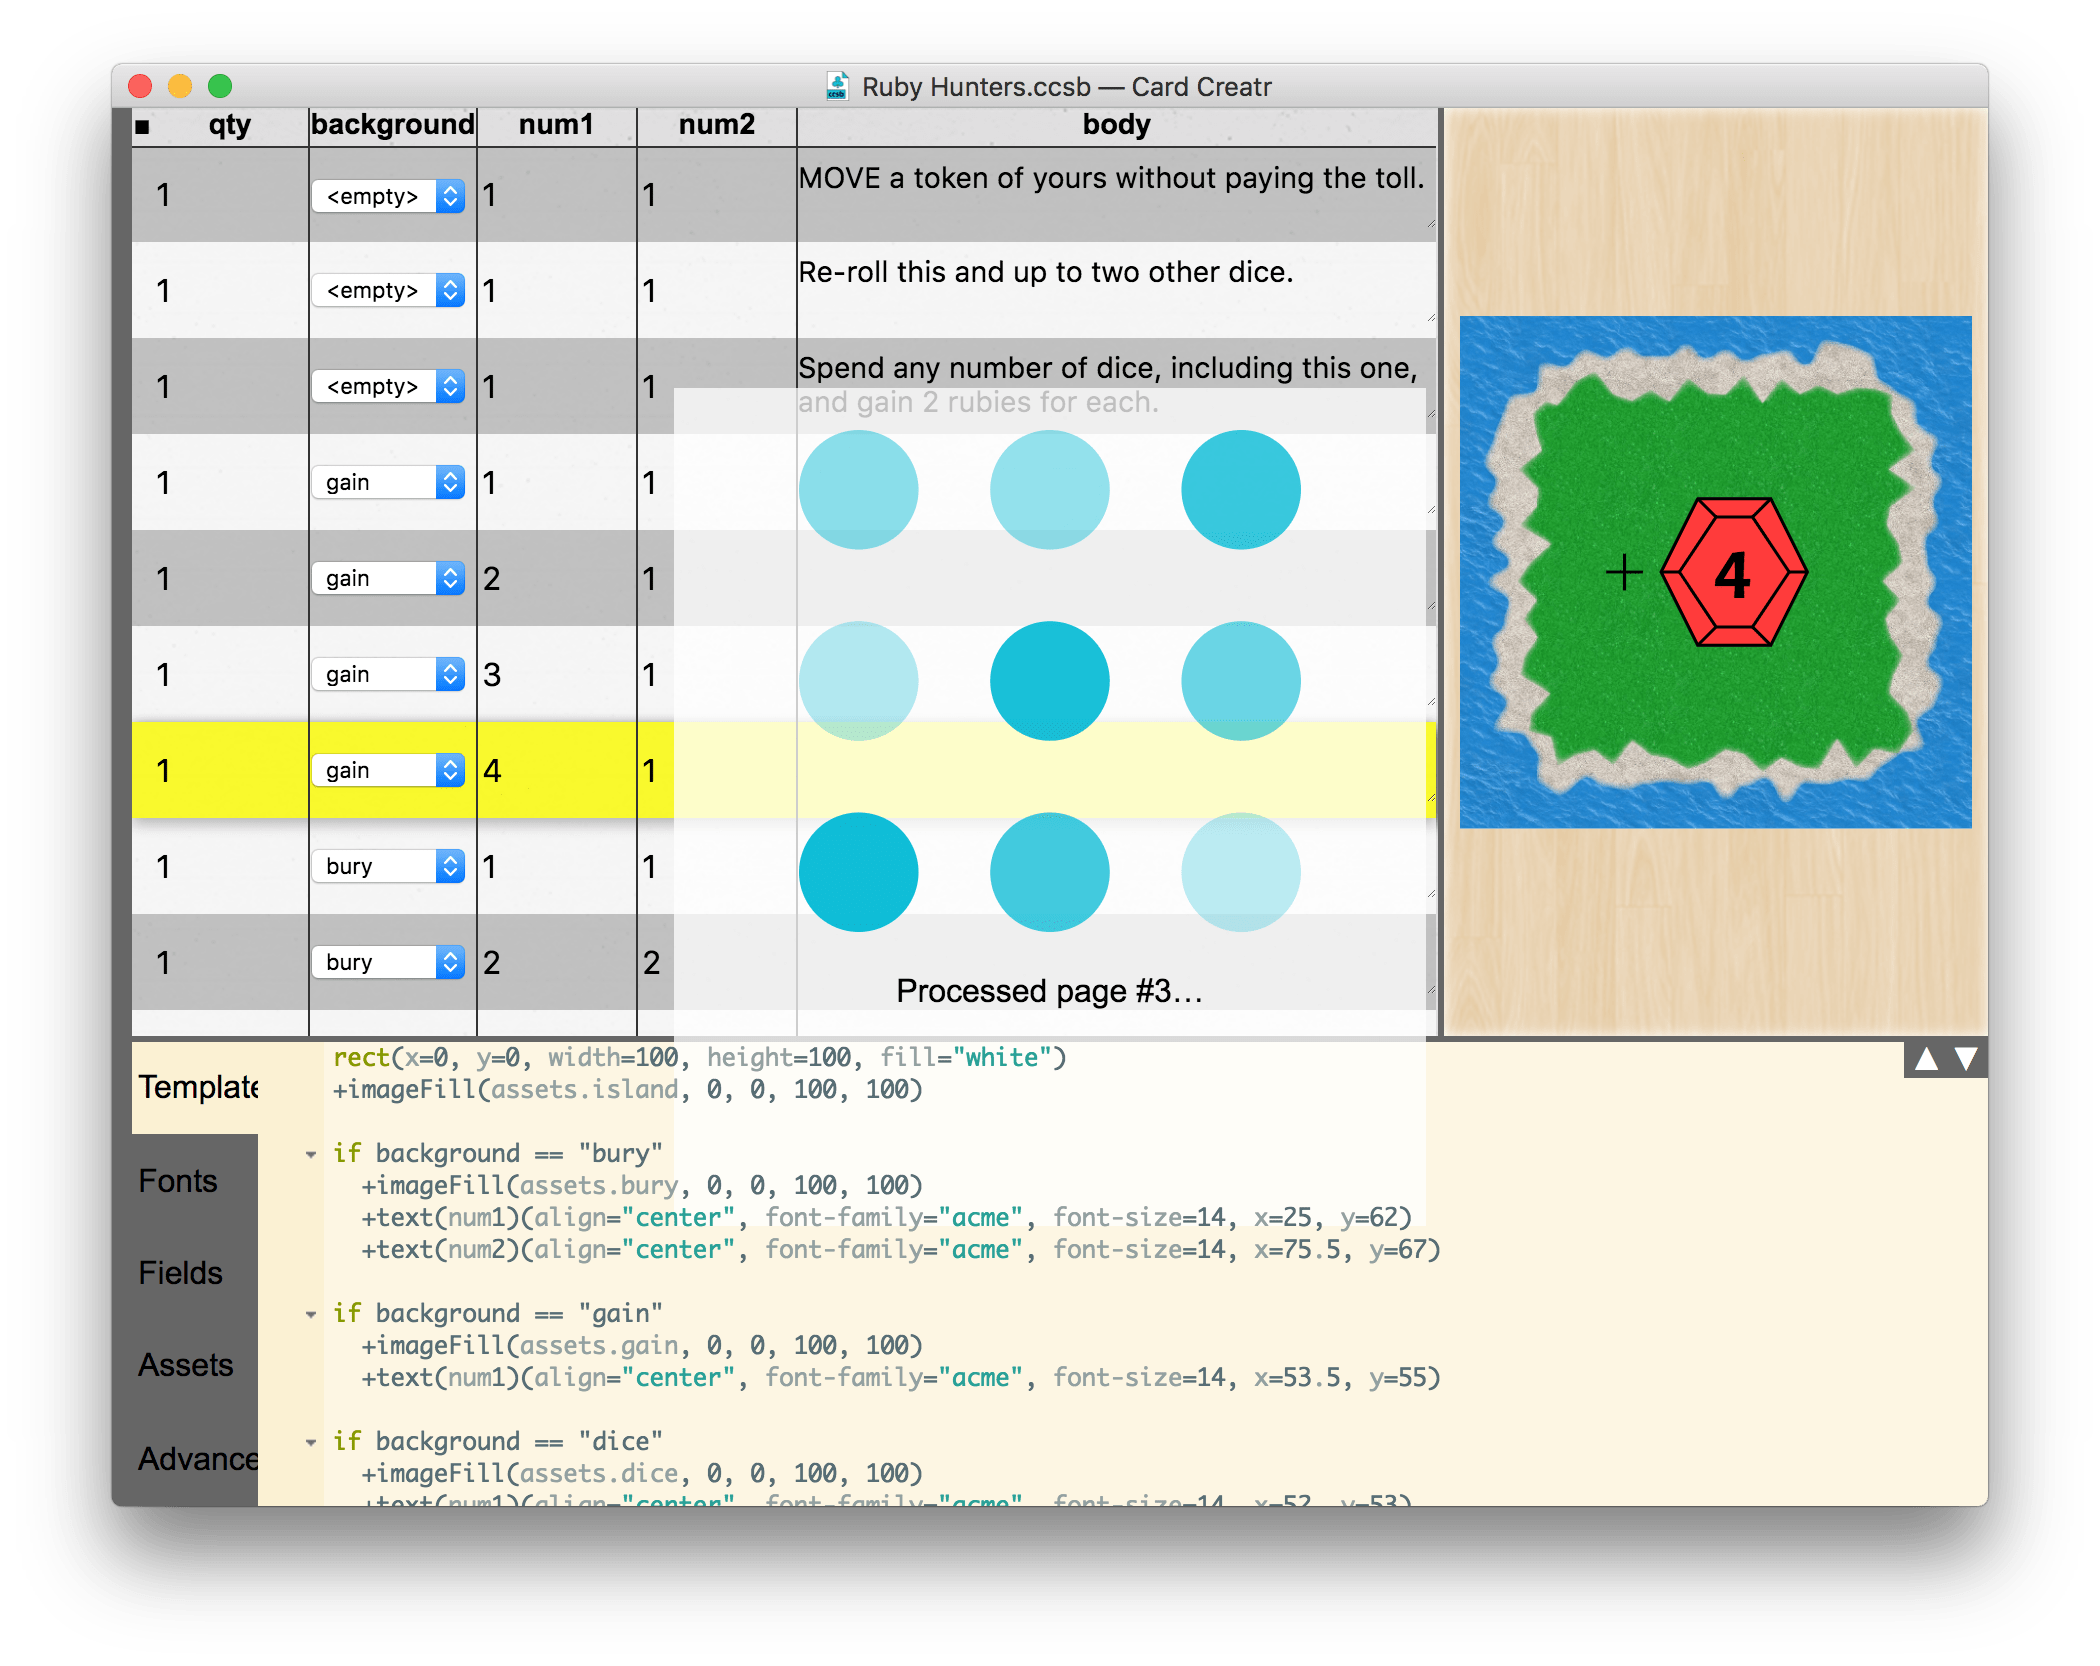
After making the initial design, I decided that it needed a splash of color. I went back to Illustrator and made a common island-like square background, which I added as an asset. I also replaced the three existing assets with versions with more color.

The template is ready now! Time to fill in the spreadsheet:

Next, go to File → Export as PDF:
And after a few seconds, you have the PDF for home printing:
You can download my full ccsb file below, which includes all of the features from this tutorial and a few more tweaks I made afterwards:
I hope this tutorial was helpful. To learn more, read through the other tutorials, and if you have specific questions about how to do something with Card Creatr Studio, ask on the feedback and support page, which you can access by clicking the “Feedback” link at the top of this web site.